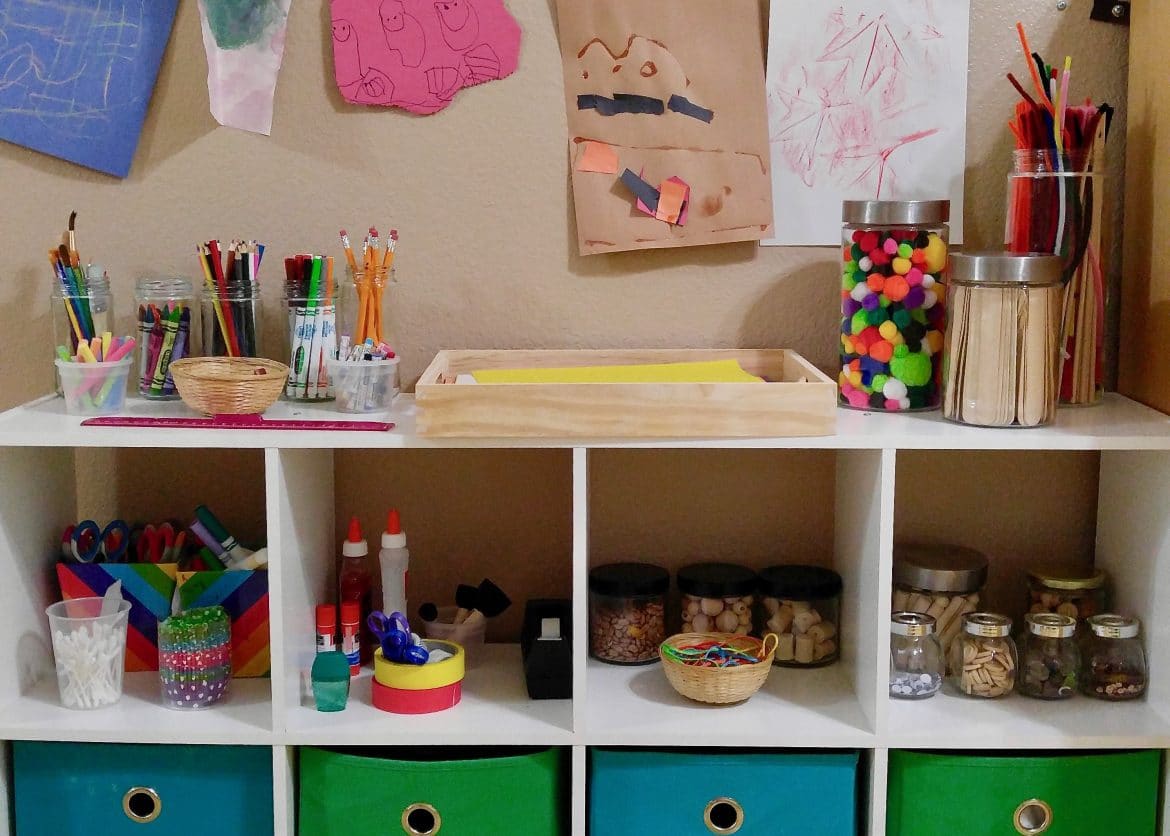
As a former art teacher, I know the importance of art and being creative for children. The value of having the time and space to create is priceless and something that has been a priority in my own parenting. For us, our art space is a spare bedroom. We use the room as an office, my sewing/art room, as well as my son’s art room. We have a low cube shelf where I store supplies that my son can easily reach and use the wall above it for displaying his latest artwork. The closet top shelf holds materials like paint that I don’t want my three year old reaching at all times. It works for us and has been so worth it. We spend hours in this room, my son deep in imaginative play or creation.
Our art space is not just used for painting and drawing. Art itself helps to develop a whole range of knowledge. Our art space supports science, math, engineering, technology, reading as well as creativity, critical thinking, planning, and imagination. This is why, in my opinion, having a space for art and learning and creation is far more important than having a space for toys. Here in our art space, my child can create toys that come straight from his imagination.
Creating an art space is not difficult at all, even if you live in a tiny home. Art can be done anywhere, on any budget. Here are 10 simple steps to creating a space to create for kids:
- Find a space. This is probably the hardest step, especially if you live in a small home or apartment. If you have a spare room that can be devoted to messy play, tinkering, and art, then I highly recommend that you utilize it. But otherwise, it doesn’t have to take up much space. The art space can even be the kitchen or dining room. All you need is a drawer or shelf to store some art supplies and a tablecloth to transform a space into one for art. You can also stick a small children’s table in an empty corner with some shelves on the wall for supplies. A child’s easel can be folded and put away. Or even designating a spot outside would work. Organize some art supplies in a picnic basket and bring it to a local park. Don’t overthink, just imagine where you would like to do art and make it happen.
- Consider your preferences. What your art space will look like depends on what you feel comfortable managing. As the parent, you will be the one either cleaning up or nagging your kids to keep it tidy or, if you like, just leaving it messy. How do you feel about mess? How do you feel about art? Will you be participating in art creations? How many supplies do you want to keep on hand? What kind of supplies do you feel comfortable with? Some parents prefer to keep only crayons and markers and skip out on messy things like clay and paint. Others want their art space to look like a craft store.
- Consider your child/children’s ages and personalities. If you have very small children or infants, it may be a good idea to keep some or most of the art supplies in high and unreachable areas to prevent choking and ingesting hazards. Preschoolers and school age kids may be able to handle having all the art supplies at their fingertips, but it really depends on the child and what you feel comfortable with making available. My son, at age three, is trustworthy with most art supplies, but I keep paint where he can’t reach it because he gets very messy when he paints. So take note of what you want kept where.
- Plan out furniture and storage. Once you get an idea of what you feel comfortable with maintaining and making available to your kids, make a plan on how you want the area to look. Do you need a child sized table? Can everyone work on one surface? Do you need shelves or a bookcase? What about child safety locks for cabinets? Is there somewhere art can be placed to dry or for safe keeping? Where? I highly recommend IKEA for solutions on creating an art space.
- Think ahead. What I mean by think ahead, is save yourself the headache and consider possibilities for messy work. If you are worried about the floor, make a plan on how you will keep it clean. Do you need a drop cloth? Where is the nearest sink to wash brushes? If it’s far, having a bucket for throwing dirty brushes is super helpful so you aren’t running dripping supplies across the house. For protecting the table, trays and tablecloths are also helpful. Also, how do you want the kids to be dressed? They can just wear their normal clothing, you can get aprons, you can provide large t-shirts or smocks, or just strip them down and let them create while naked.
- Designate areas for displaying art, drying art, and safe keeping works in progress. It is so helpful to already have a spot to put a picture with wet paint not to mention having an area for works in progress. When children are able to take their time on a project and come back to it when they want, it can really help develop their creativity. It also helps with growing their patience and ability to criticize and plan. I also think it’s a great idea to have somewhere to display their work. We use string and clothespins so I can easily switch out works on art but so that my child sees that his work is valuable and something to be proud of.
- Gather your supplies. You don’t need to run out and buy all the art supplies right away. In fact, it’s better to slowly introduce materials to children so that they learn how to use them. Start with what you have and then go from there. If all you have is some pencils and crayons, it’s a great place to start. Look for sales, second hand items, and check out what you already have. Even pens and computer paper can be perfect for some basic drawing. Also consider items that are not explicitly for crafts. Toilet paper rolls/paper towel rolls, ribbons, bottle caps, scissors, tape, straws, etc. all work well at expanding a child’s imagination because they are open-ended. Even natural items like sticks, pine cones, rocks, and leaves are perfect for this. You’ll be surprised at the interesting things a kid can create when left with some simple materials.
- Store your supplies. How you store your supplies will depend on where they are stored and how much space you have. I love having open shelving so that I can fill jars and cups with supplies that I feel comfortable giving my son access to. When our art space was a cabinet shelf, I had utilize the vertical space, so the supplies were stored in plastic containers that were stackable. Smaller spaces will also need to consolidate supplies so that they all fit (like putting crayons, markers, and pencils in one container). However you decide to store supplies, I recommend choosing clear containers so that materials are easy to see and find. Mediums that you cannot find will not be used and will sit collecting dust.
- Make some rules. Once you have the space set up, it can be super helpful to make some ground rules, especially with school age children. I recommend sitting down and making the rules together if your child is old enough, it will make it more likely that they will be followed if they have a say in them. Consider rules like cleaning up when they are finished, art supplies stay on the table, only drawing on paper, etc. With smaller kids, it’s really helpful for them to have clear boundaries.
- Start creating! Once you have an art space set up and ready to go, use it! A good place to start is to try leaving some art materials out for the kids to explore when they feel inspired. For example, setting out a mix of materials like glue, paper, dried beans, and crayons and waiting for them to notice and interact. Pinterest is a great resource for hundreds of age appropriate art projects, but all you need is space and time!

